
Darnell Cottage "Quaran-Tour": Stucco Fireplace Facelift
We’ve been in this home a few years now and our cottage needed something fresh.
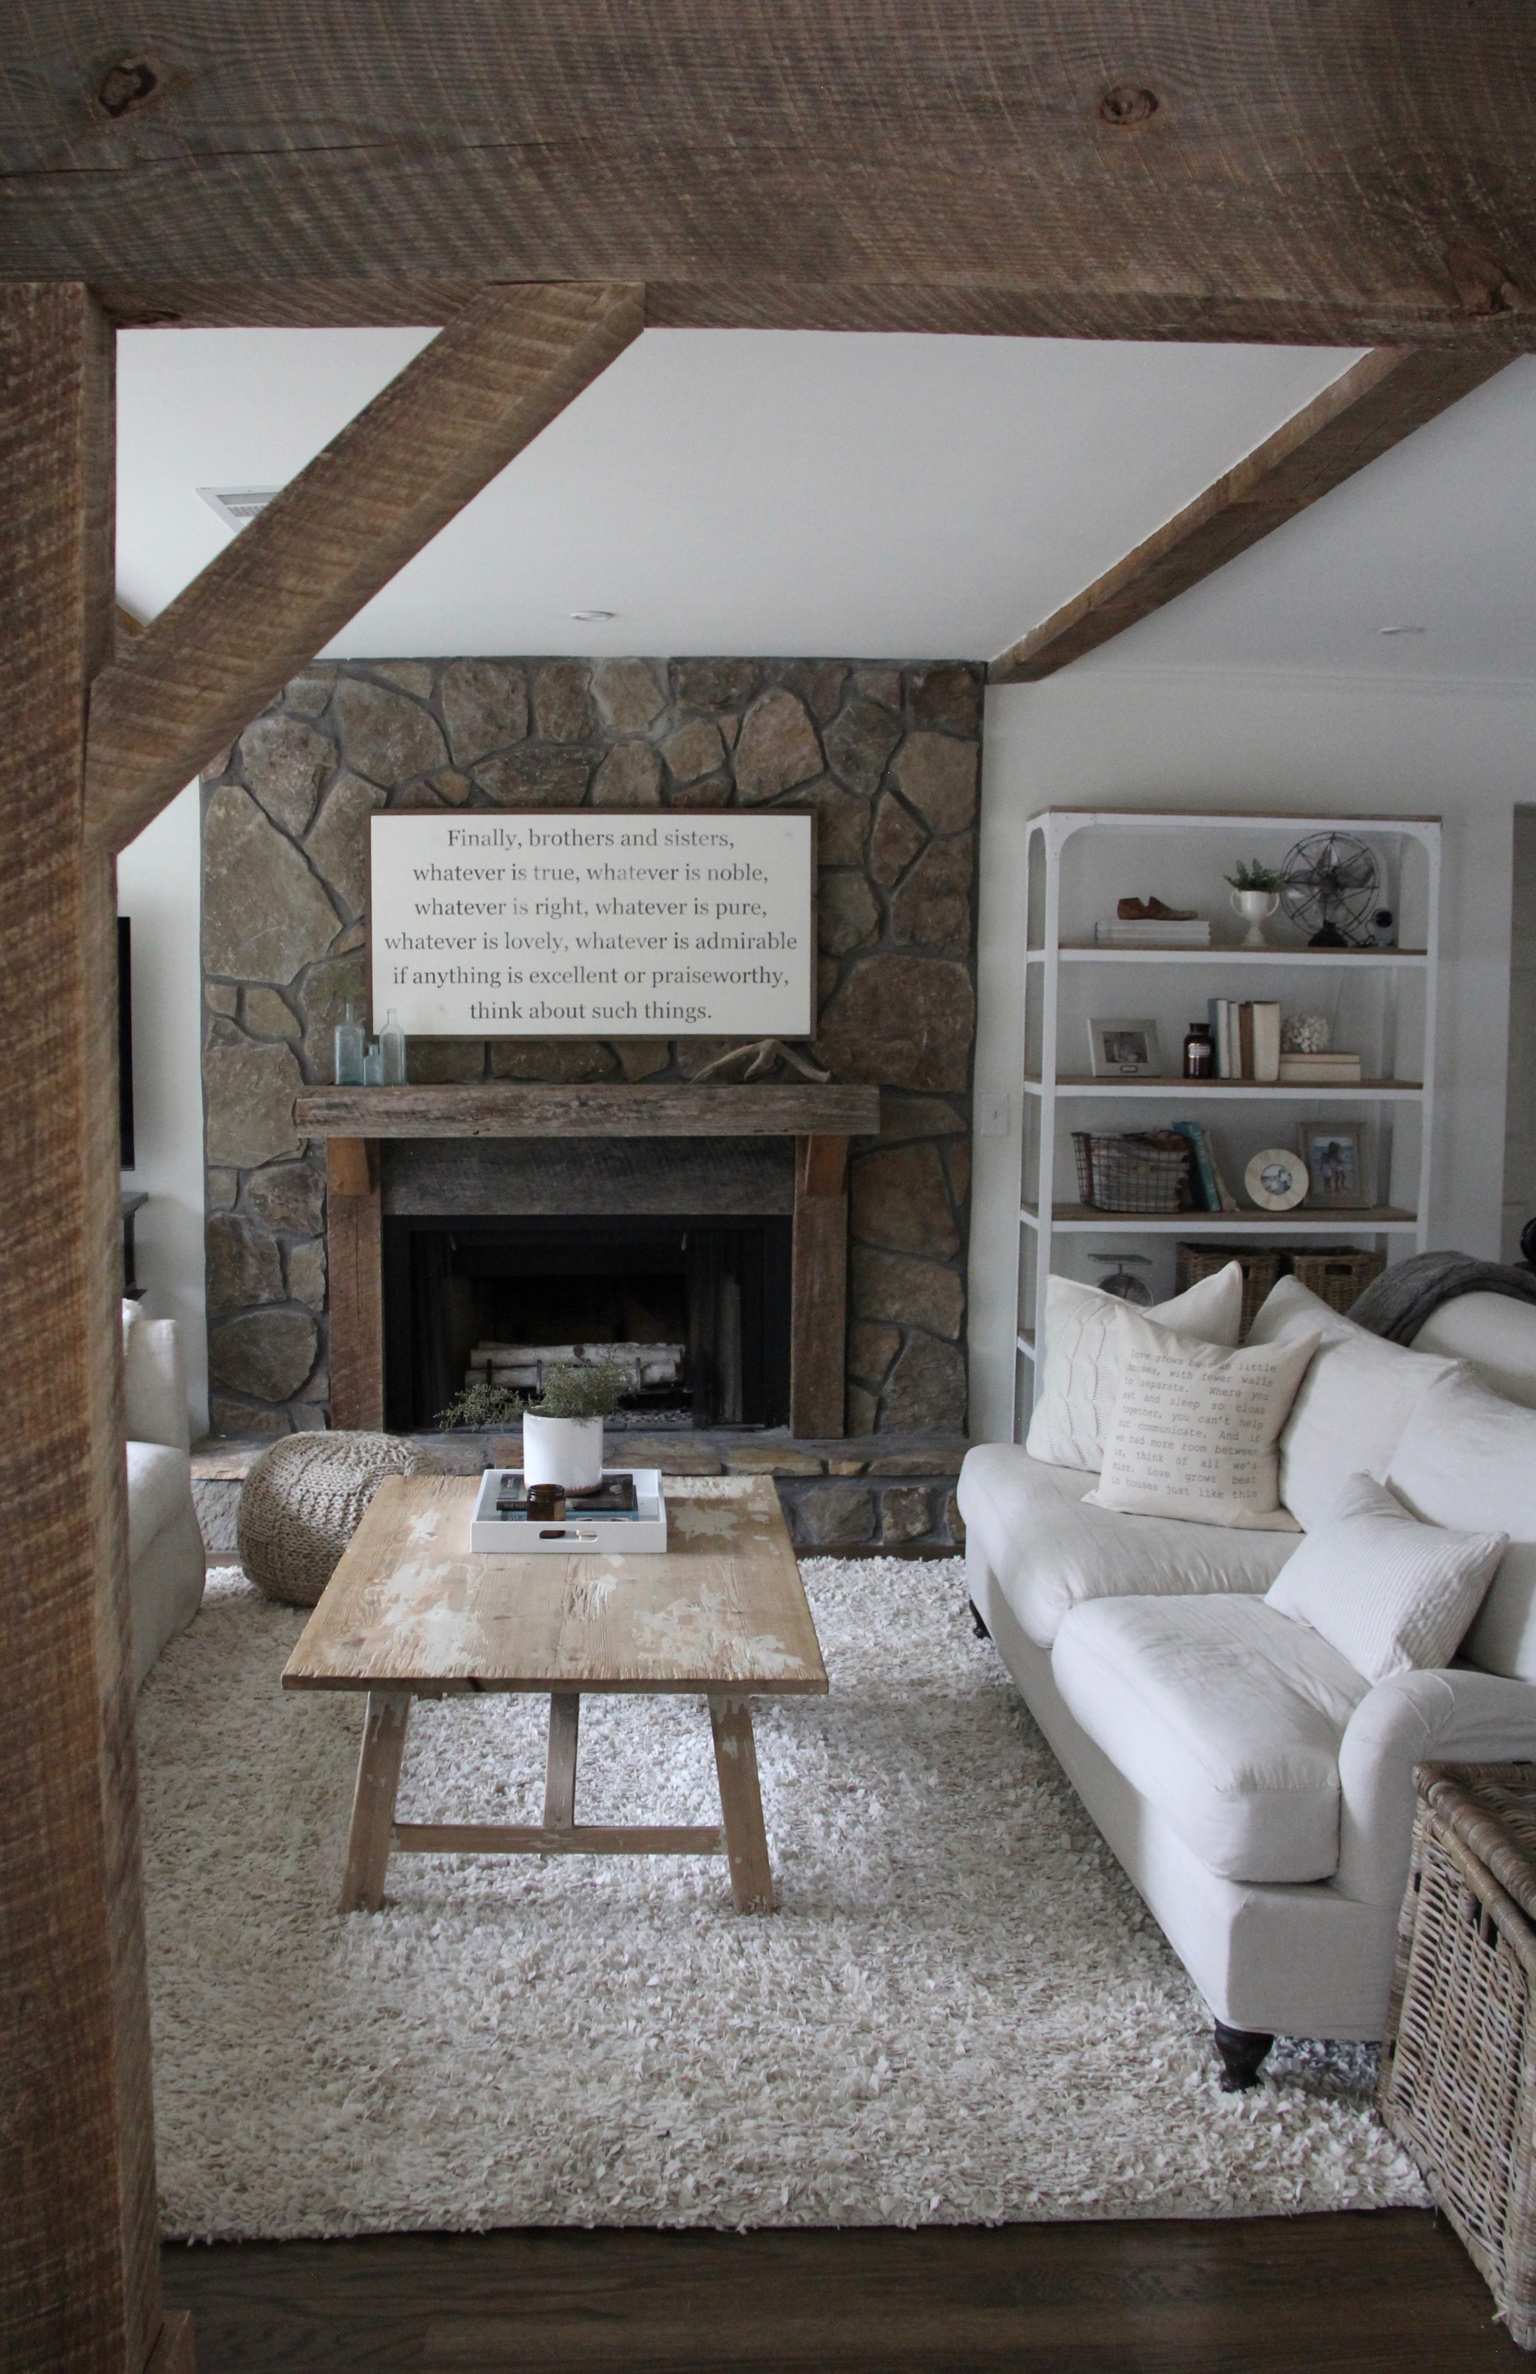
Originally we wanted to keep the stone on the fireplace because we loved honoring the original character of the home. We added a rustic wood mantle and beam and it was quite cozy. Check it out in this feature in BHG.
But, we were ready for a change!

So we started dreaming up some ideas. We wanted to brighten up the space and make it feel bigger (hello 8 ft ceilings), while still keeping the cottage feel.
We loved the idea of stucco. In fact, the exterior of the home is original stucco from 1982. It’s cozy and textured, yet modern with nods of beach living.
So we made a plan: cover the stone, leaving only the top of the hearth original, and also keeping one rustic beam for the modern mantle.
I told Casey I thought it was doable, and after-all it was my birthday present, so off we went.
Check out Anisa and Casey sharing about their fireplace facelift!

Here’s our #tutorial -
STEP ONE - Give yourself a pep talk! You may have never messed with stone before, but you’ve spray painted some things. You have street cred. You’ve got this.
STEP TWO - Mix together, and cover that thing up! “It’s going to look like a Greece villa that’s been here for hundreds of years by the time I’m done with this.”
STEP THREE - Wow I should probably step outside. Those fumes are making the room spin…
STEP FOUR - Well… *steps back and stares*
STEP FIVE - SOS…dials number for skilled stucco artisan.
Yes, you read that right. We went ALL in for this DIY and had to hire help to finish the job.
A realization in this entire feat was learning when to put down the tools, step back and allow the professionals to do THEIR job. And guess what? We ended up with a better end result! There are some things we can tackle in the DIY world, but we will stick with design for the most part ;)
It feels right for a little Disclaimer:
Even with design - Pinterest will only take you so far! Designing & managing a whole home renovation is not a small task. When it comes to pairing certain finishes, handling the nitty gritty details, communicating with the contractor, measuring to make sure things will actually work & particular knowledge on products, we have 17 years of experience in this.
And while we may not be skilled stucco artisans (So close, so close), we’ve built an incredible team that in turn creates a better end product of experience and design for clients, because we carry that knowledge and experience. We know our lane and our specialty is doing design and operating as a construction management specialist.
Okay, enough of that… Here’s what you really came here for - the photos!
Here is the “before-before" // When we first bought our home

Here is the fireplace after our renovation a few years ago
Floating the stucco evenly was NOT easy and getting a mix that wouldn’t dry out too fast or be too soupy was SUPER challenging also. This is when it turned the corner, thanks to hired help!
Here’s the DIY process on our end. We mixed the mortar and concrete and started filling in all the grooves… seemed easy enough… it’s not.


Currently a mirror to help it feel more open with the low 8ft ceilings. Knowing me, this will change frequently :)
Here is where we landed!! // White stucco fireplace with original stone hearth & rustic wood beam.
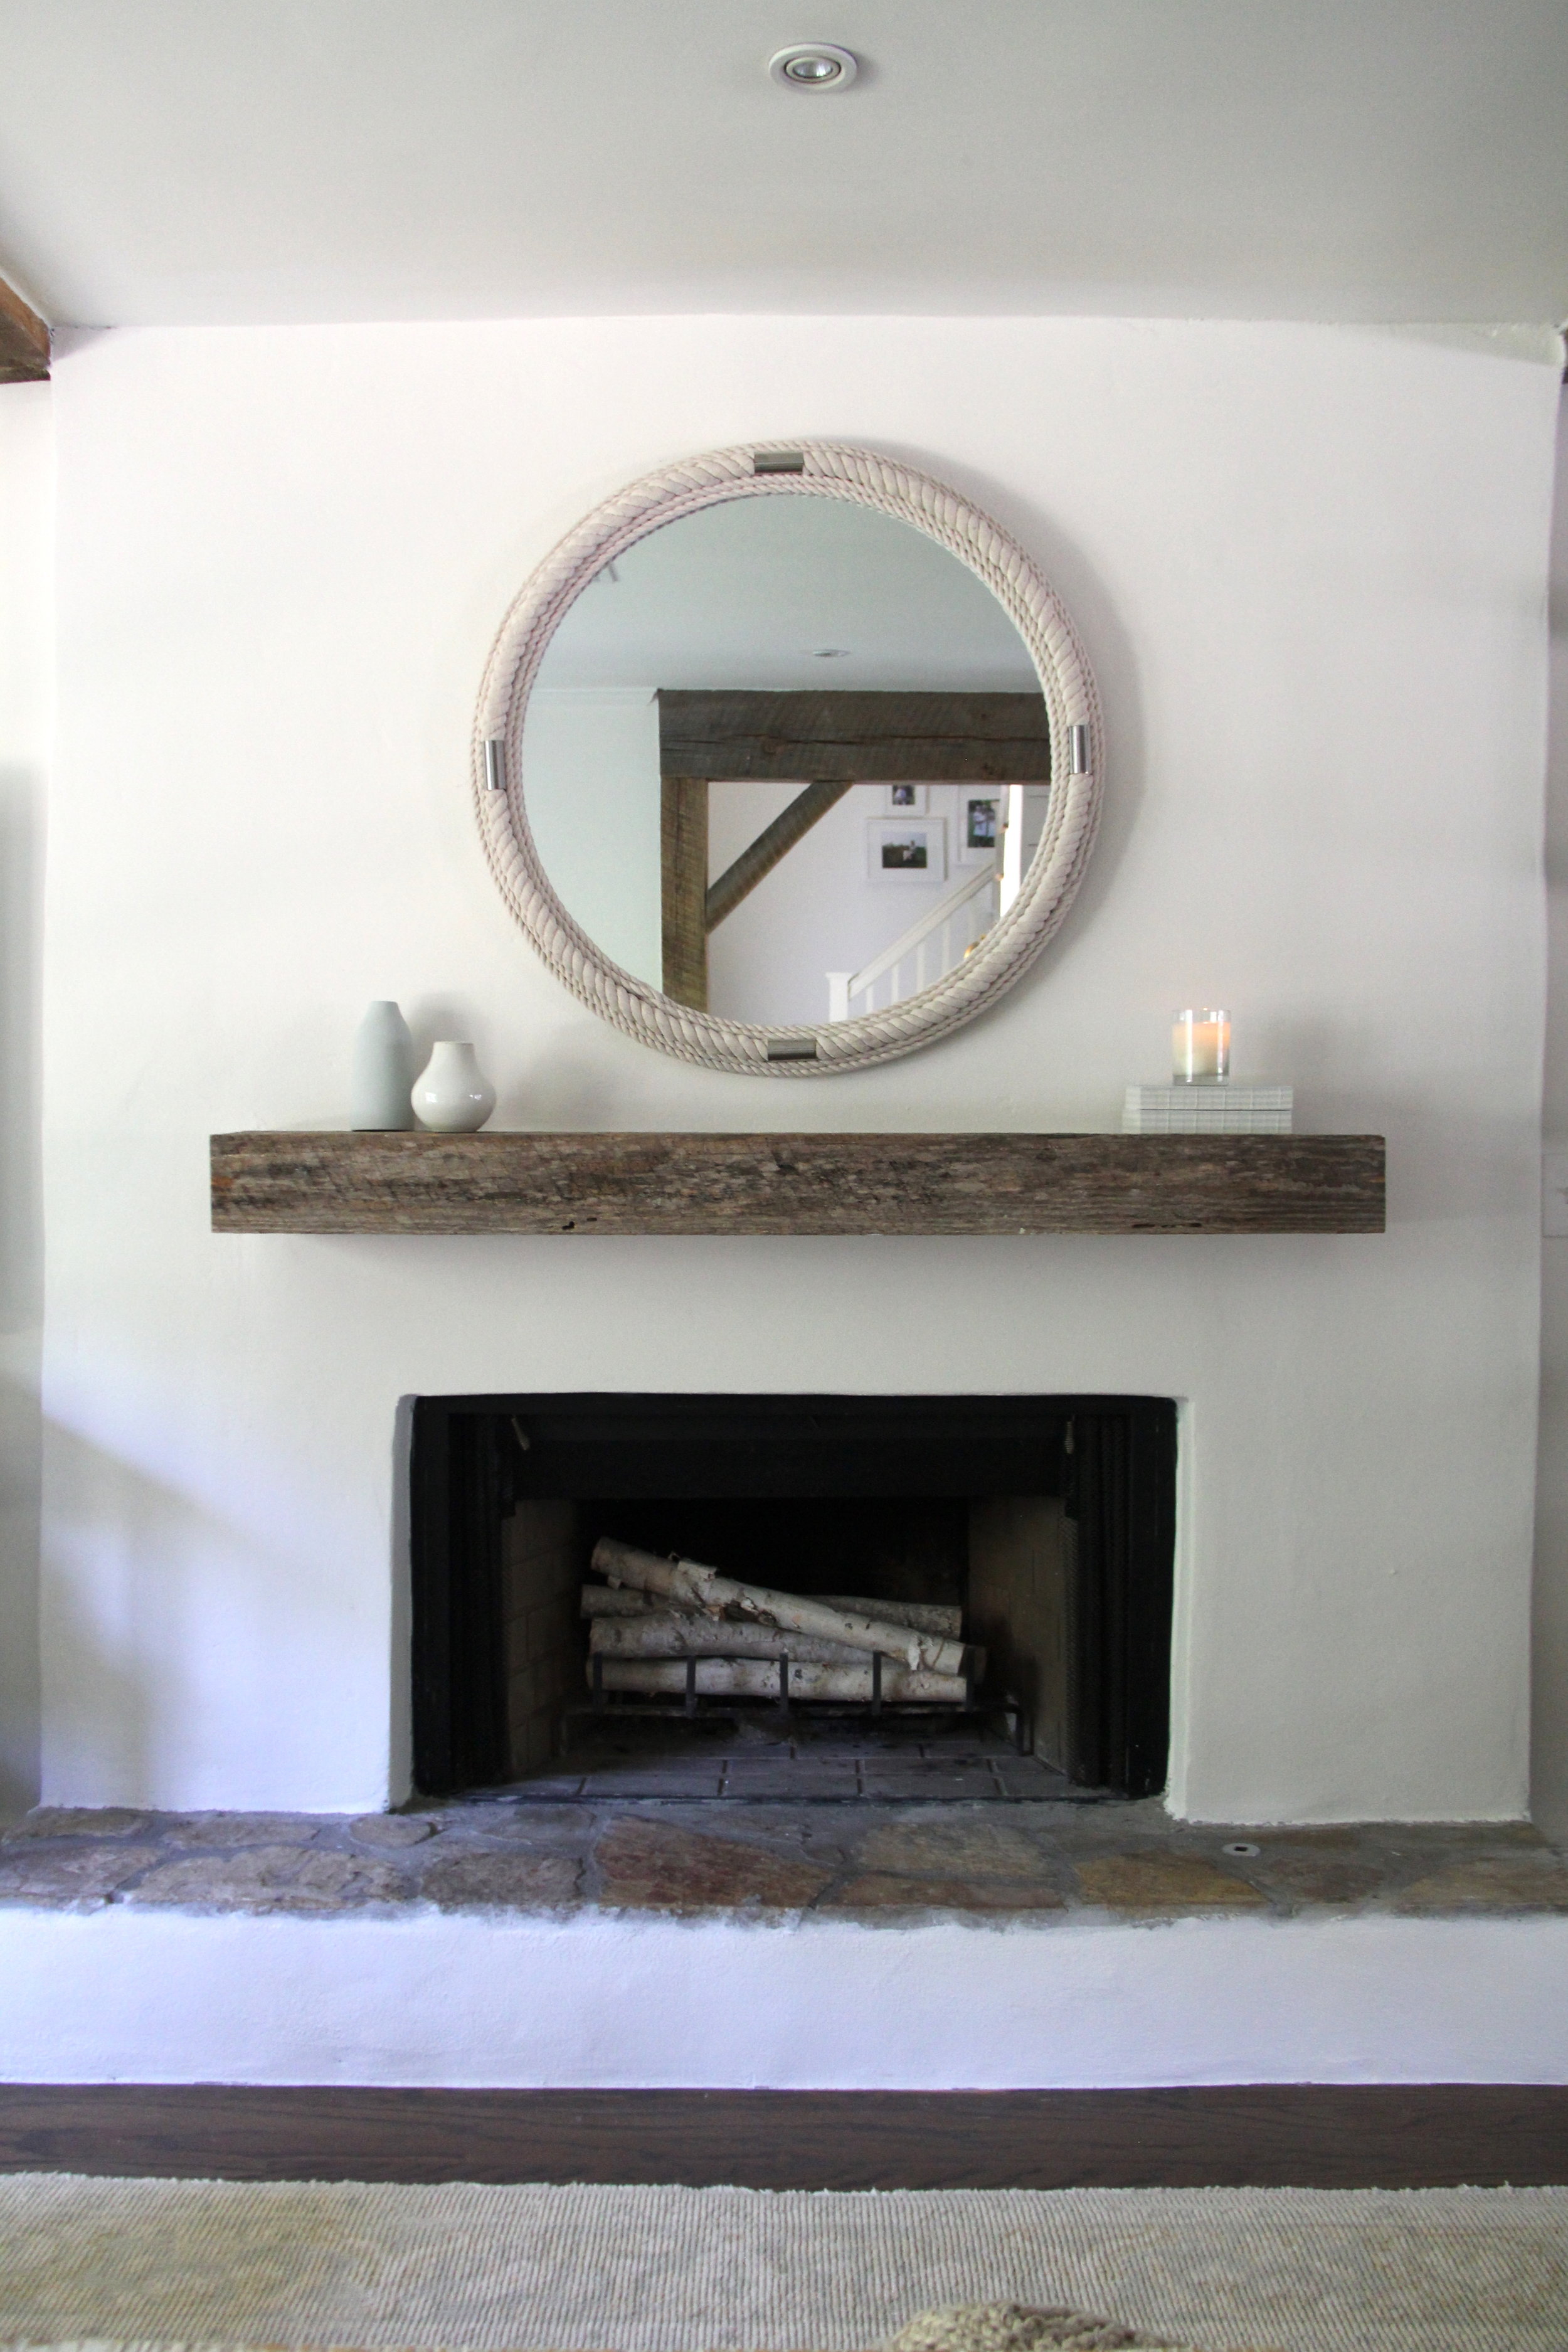

We absolutely LOVE how the finished product turned out! It added such a fresh & bright feel to our low ceiling and limited natural light living room. We love that it has movement to give an old/textured feel to coincide with our cottage home feel.
Ready to tackle your fireplace project?!
-Anisa